
Adding and Managing Patients
How to add new patients, edit existing records, and manage your patient database in DentalView.
Your Patient Base Is the Clinic
Everything in DentalView hangs off the patient record: appointments, the dental chart, prescriptions, payments, reminders — all of it attaches to one patient. A record with a phone number gets automatic reminders, recall follow-ups, and duplicate protection; a record without one is a name the system can't help you with. So the habit that pays off most is simple: capture at least the name and mobile number at first contact, every time.
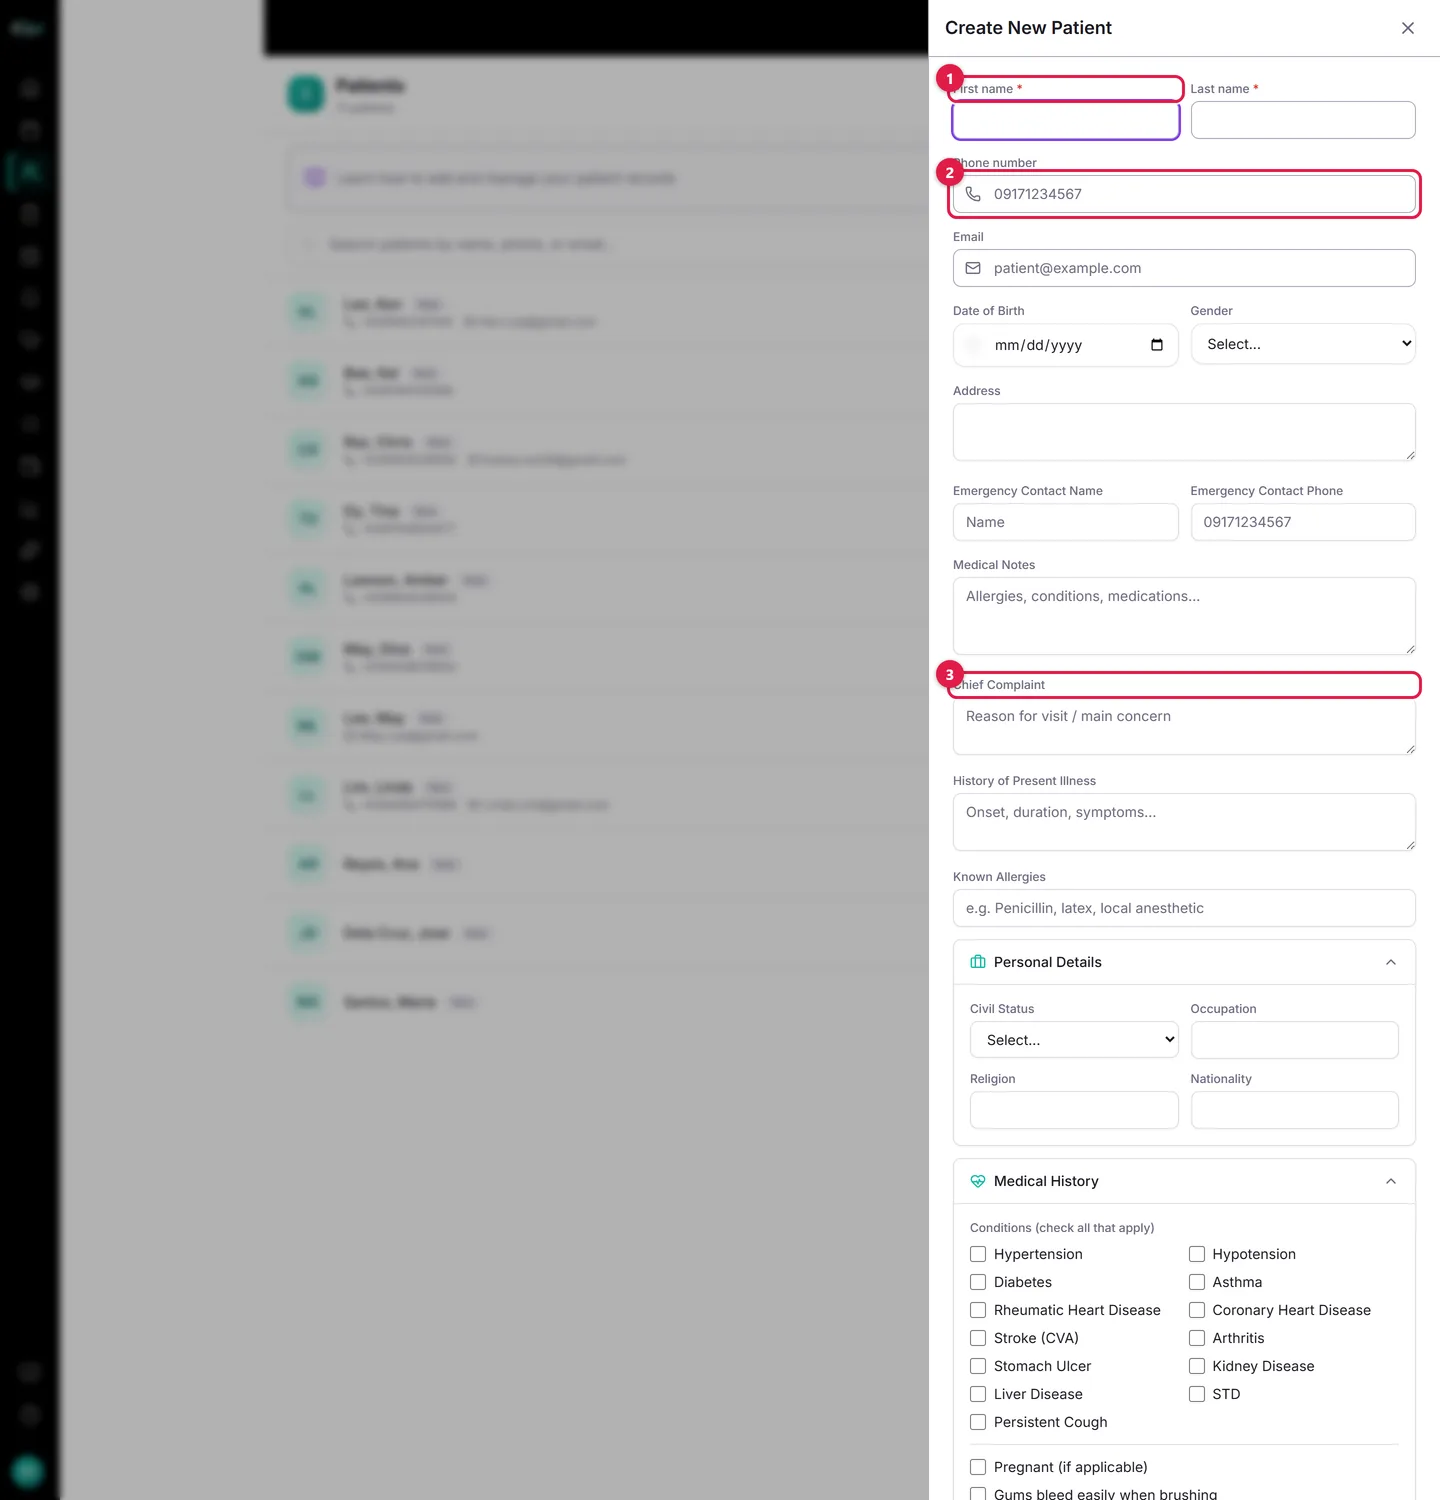
On this form: ① First Name / Last Name — the only two required fields; everything else can be completed later. ② Phone — strongly recommended: SMS reminders, recalls, and duplicate detection all rely on it. ③ Chief Complaint and the intake sections — expandable sections for Chief Complaint, Allergies, Personal Details (civil status, occupation, religion, nationality), Medical History (a checkbox grid of conditions, medications, smoking), Dental History, and a full Clinical Examination (vitals, extra-oral, intra-oral, gingiva, occlusion). Fill them for a complete first visit; skip them for a quick registration.
Registering a New Patient
- Open Patients in the sidebar and click Add patient (on mobile, the round + button).
- Fill in First Name and Last Name — the only required fields — and add the phone, email, and birth date if you have them.
- For a full first visit, expand the intake sections and work top to bottom (next section).
- Review the Patient Consent checkboxes — treatment records, SMS notifications, data processing. They're pre-ticked and stored with the date and method, which is your RA 10173 paper trail.
- Click Add Patient.
A front desk registering a phone booking needs only steps 1, 2, and 5 — thirty seconds. The clinical detail can wait for the chair.
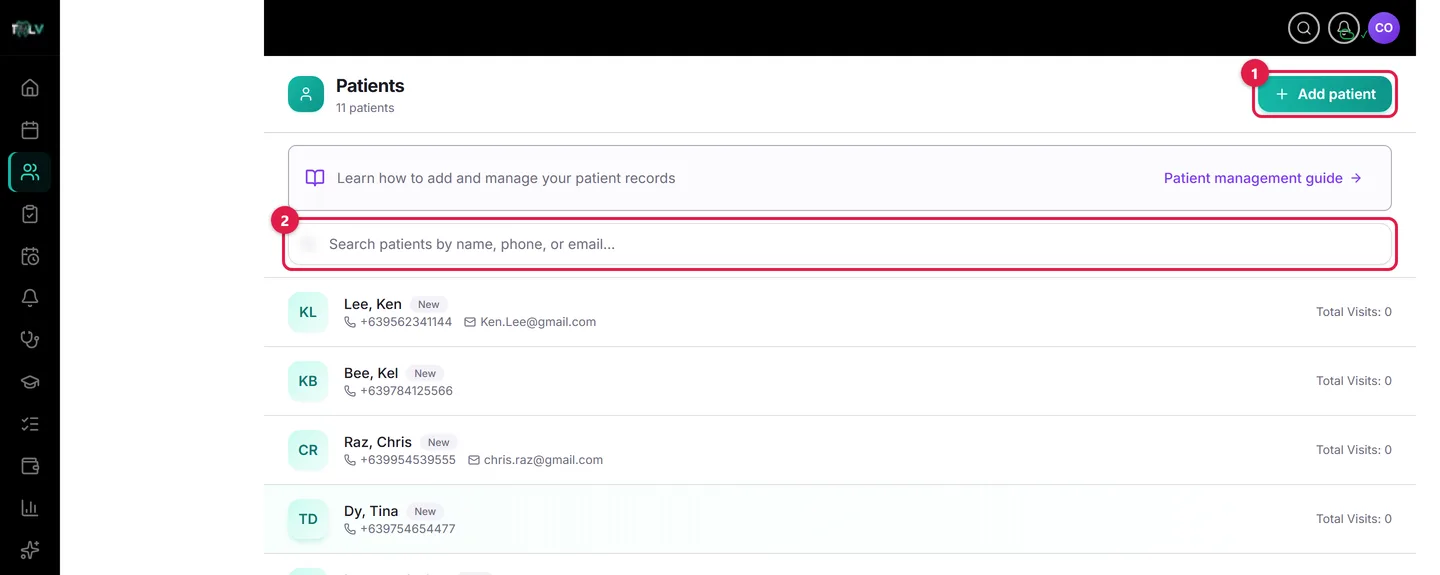
On this screen: ① Add patient — opens the registration panel for a new patient; this is where every patient record starts. ② Search box — type any part of a name, phone number, or email; with 3 or more characters it searches your entire patient base, not just this page.
The Intake Sections, Explained
The collapsible sections below the basics mirror a paper intake form, and each one feeds a different part of the system:
- Chief Complaint / History of Present Illness / Known Allergies — kept at the top because allergies are safety-critical; what you type here shows as a red alert strip on the profile.
- Personal Details — civil status, occupation, religion, nationality. Useful for rapport and for BIR-compliant records.
- Medical History — a checkbox grid (hypertension, diabetes, asthma, heart disease, and more) plus pregnancy, bleeding gums, current medications, and smoking. Check what applies; it prints with the clinical record.
- Dental History — previous prophylaxis, extractions, dentures and since when.
- Clinical Examination — vitals (BP, pulse, respiration, temperature), extra-oral and intra-oral findings, gingiva status, occlusion classification, and calculus deposits. This is the dentist's part; reception can leave it collapsed.
Duplicate Protection — Trust It
Double records are the classic front-desk mess: two charts, split payment history, reminders going to the wrong entry. DentalView guards this at save time:
- Phone match → the system links to the existing patient automatically and tells you: "Existing patient found — linked to their record." No duplicate is created.
- Name match only → you decide: Link to Existing or Register New (two patients can genuinely share a name). When you link, intake fields you typed are not applied to the existing record — open their profile and edit there instead.
Finding Patients Fast
Type in the Search patients... box: 1–2 characters filter the page instantly, 3 or more search your entire base by name, phone, or email. Since patients often give a number and not a spelling ("naka-register po ako, 0917…"), searching by phone is usually the fastest lookup at the desk. Multi-branch owners also get a Search all branches checkbox, and shared patients carry a purple "Home: {clinic}" badge.
Living With the Profile
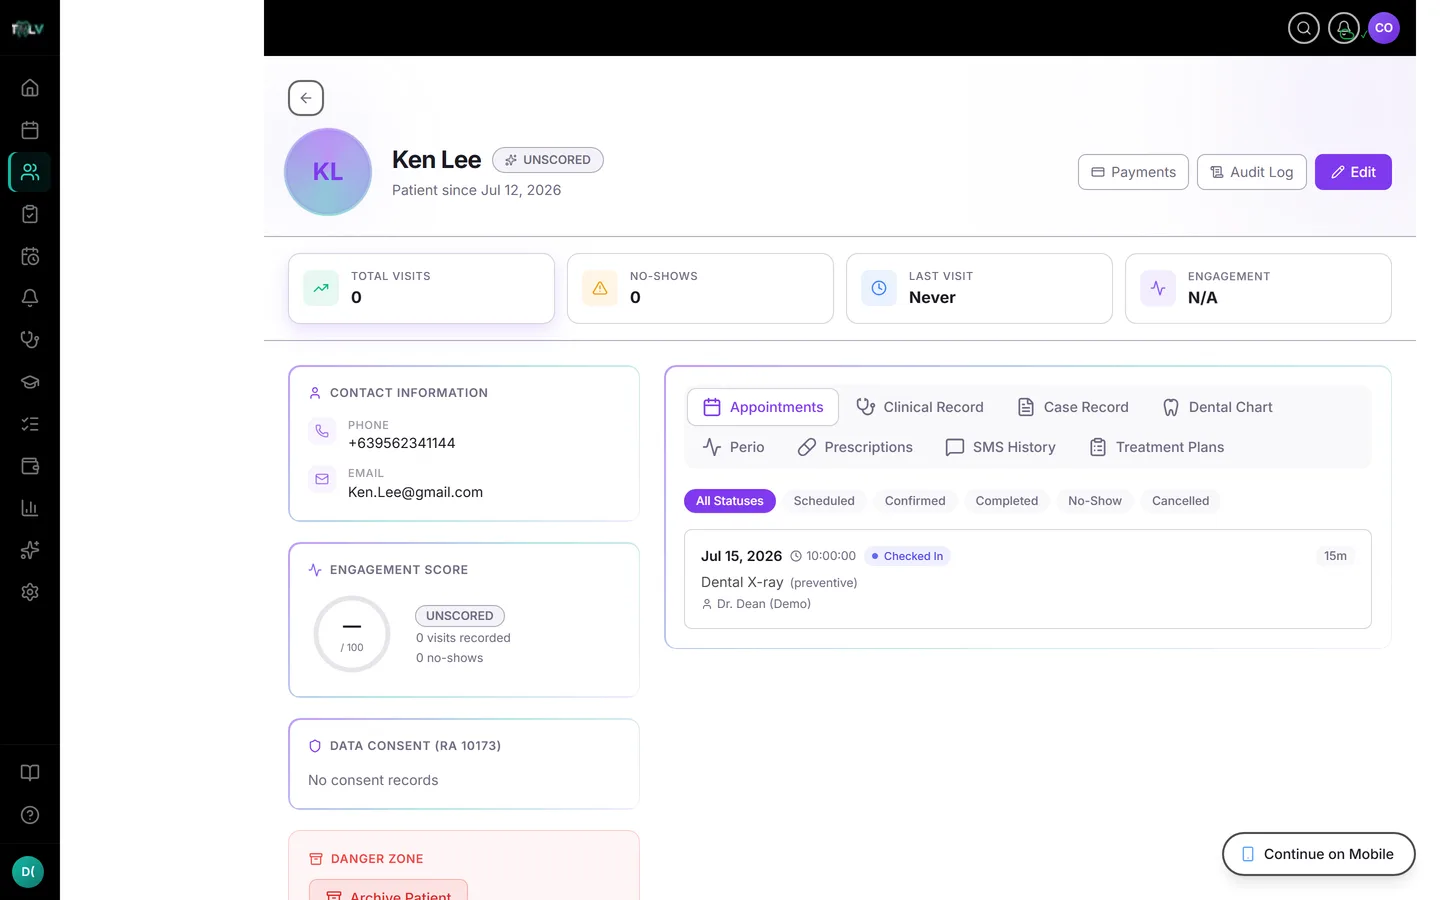
The profile is the patient's home page: visit stats and no-show count on top, contact info, engagement score, medical alerts and consent records on the left, and the full history in tabs — Appointments, Clinical Record, Case Record, Dental Chart, Perio, Prescriptions, SMS History, Treatment Plans. The Payments panel opens from the header. Use Edit (top right) whenever details change — a working mobile number is the single most valuable field to keep current.
Archiving, Undo, and the 30-Day Net
When a record was created by mistake or a patient asks to be removed, use Archive Patient in the profile's Danger Zone. Patients with visit history make you type their full name first — deliberate friction, because you're archiving real clinical data. Then three safety nets, in order: an Undo banner for 5 minutes, the Settings > Recently Deleted list for 30 days, and only after that automatic anonymization. Nothing is ever hard-deleted from the interface in one click.
Was this article helpful?
Need more help? Contact our support team