
QR Self-Intake Forms
Let patients complete their intake form and sign on-screen before the visit by scanning a QR code.
Let Patients Do the Typing
Every clinic knows the clipboard ritual: the new patient fills a paper form, the front desk retypes it, and somewhere between handwriting and haste the mobile number loses a digit. QR self-registration removes the retyping. The patient scans a code in your waiting room (or taps a link from your Facebook page), fills the form on their own phone, signs with a fingertip — and the submission lands in a review queue where your staff accepts it into the patient base. Nothing enters your records unreviewed.
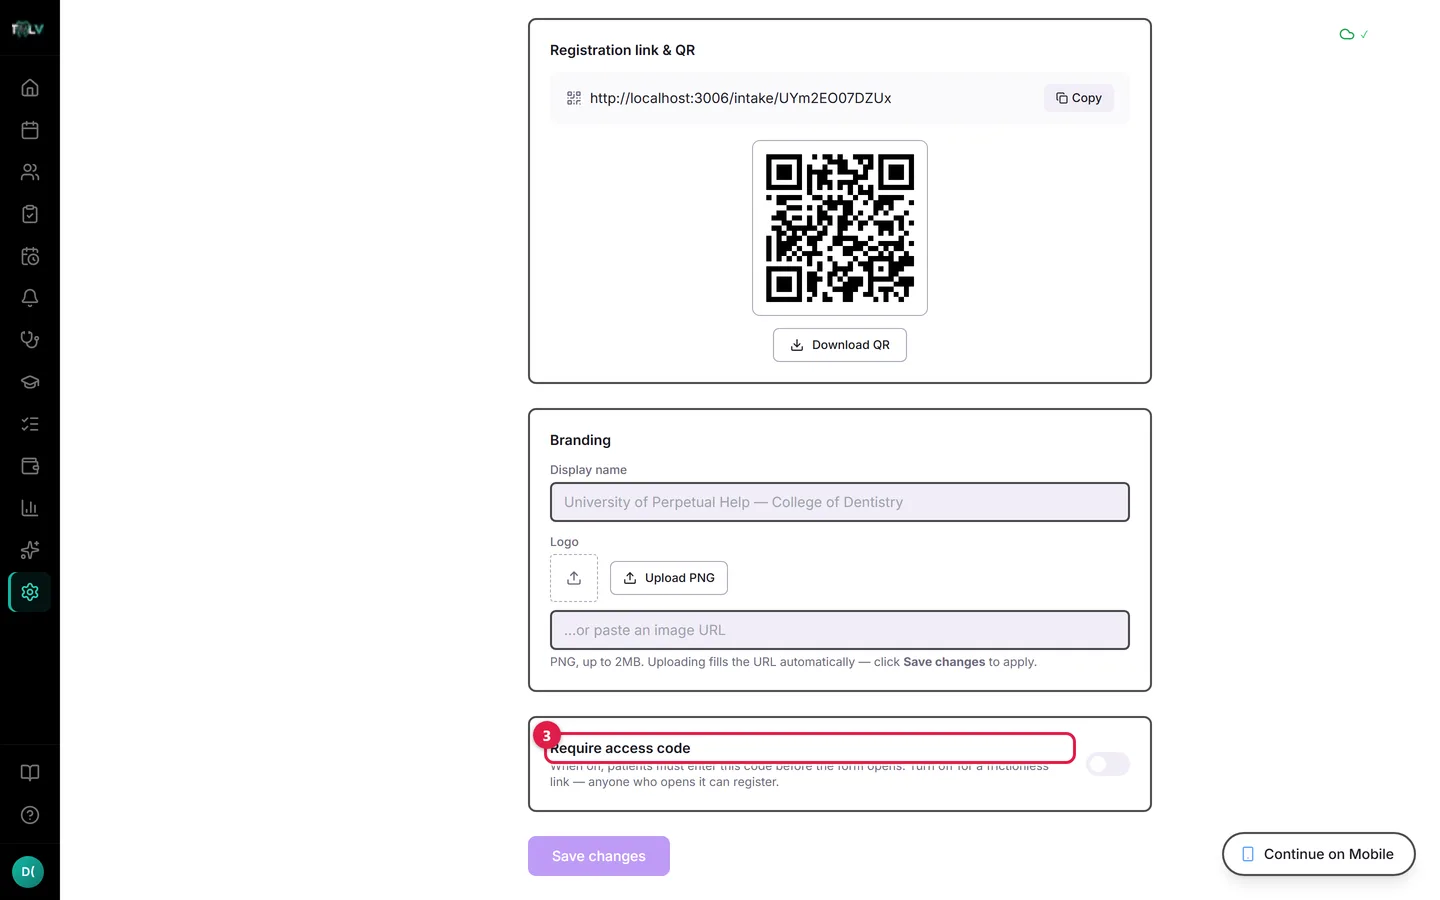
On this screen: ① Enable self-registration — the master switch for your public intake form; turning it off closes the page immediately. ② Download QR — a print-ready QR code of your link for the reception desk or flyers. ③ Require access code — with this on, patients need the code before the form opens, so only people you gave it to can register; Generate creates a safe 8-character code.
Setting It Up Once
- Open Settings > Patient Self-Registration (owner or admin).
- First time: click Create registration link — DentalView mints your clinic's unique public URL and QR code.
- Switch on Enable self-registration.
- Optionally brand it: a Display name and a PNG logo (up to 2 MB) so the form looks like yours, not generic software.
- Decide on the access code. With Require access code on, the form only opens after entering the code (the Generate button makes a safe 8-character one). Codes keep internet strangers out while the QR hangs in public view; skip the code only if the link lives somewhere already controlled.
- Save changes, then Download QR and print it — reception desk, treatment room doors, even the clinic's Facebook cover photo.
What the Patient Fills In
The public form collects identity and contact details — full name, birth date, sex, mobile, email, address — plus the consent checkboxes and a finger-drawn signature. It deliberately does not collect medical history or allergies: clinical intake needs a clinician's follow-up questions, so that part stays with you (and the system routes you there — see below).
Reviewing Registrations
Open Registrations — the queue shows a live "{n} waiting" badge:
- Expand a submission to check the details; the name fields are editable right there for typo fixes.
- Watch the phone-match notice. If the number belongs to an existing patient, choose Link to {name} — which attaches the fresh consent to the existing record, no duplicate — or Not them — create new when it's genuinely a different person (family members sharing a phone is common).
- Otherwise click Accept & create patient.
- Either way you land on the patient's edit form to complete the clinical sections — medical history, allergies, the exam. This is by design: self-intake gathers what patients know; you gather what clinicians ask.
- Reject removes junk submissions, with an optional reason.
The Consent Dividend
Each accepted registration stores its consents with date, method, and the signature image — visible in the patient profile's Data Consent card. Under RA 10173 this is the difference between "we assume she agreed" and "here is her signed consent from June 3rd, captured at self-registration." The QR form quietly builds your compliance file while it saves your front desk the typing.
If You Ever Need to Close the Door
Turning Enable self-registration off closes the public page immediately — submissions in the review queue stay put. Regenerating the access code invalidates the old one on the spot, useful if a code printed on a flyer escapes further than intended.
Was this article helpful?
Need more help? Contact our support team