
First Steps: Setting Up Your Clinic
A step-by-step guide to creating your DentalView account, completing the onboarding wizard, and configuring your clinic profile.
The First Hour Decides the First Month
A clinic that sets up its services, hours, and team on day one gets working reminders, honest reports, and a bookable calendar from the first patient onward. One that skips setup spends weeks typing prices by hand and wondering why the numbers look thin. This guide is the first hour, in order.
Create Your Account
Sign up with your email address, verify it via the link you receive, and log in. Every new clinic starts on a 30-day free trial with everything unlocked — no card required, no feature gates. The trial clock and a Subscribe Now path live in Settings > Billing whenever you're ready.
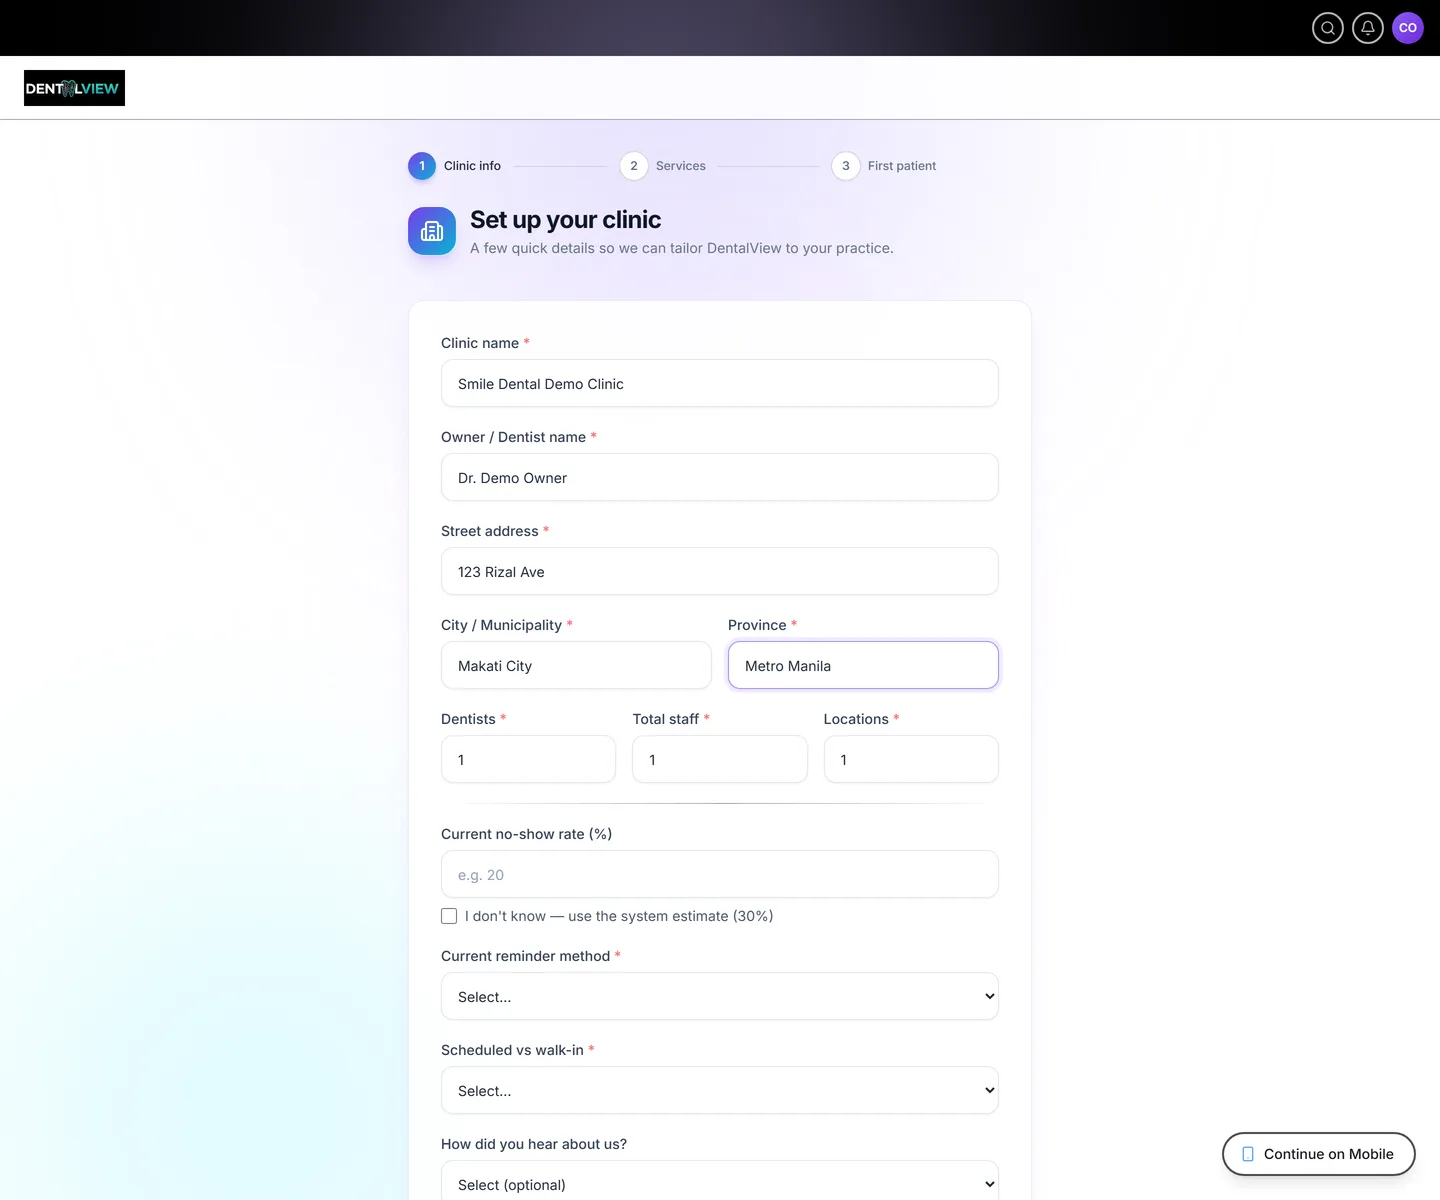
The Onboarding Wizard
The wizard collects the basics — clinic details, practice size, your current no-show rate (used later to measure your improvement). Answer what you can; every step is skippable and everything lives in Settings afterwards. Two fields deserve care even on day one:
- Clinic name — it appears on prescriptions, invoices, your public booking page, and every SMS your patients receive.
- Dentists / staff / locations — these size your plan detection, so answer truthfully rather than aspirationally.
The Three Settings That Do the Heavy Lifting
- Settings > Clinic Profile — name, phone, address, plus your Registered Business Name and TIN. The TIN block exists for BIR compliance: those details print on invoices and receipts. Owner-only to edit.
- Settings > Services — your treatment catalog with prices and durations. Services drive the booking flow, appointment lengths, treatment-plan pricing, and revenue reporting — the single highest-leverage list in the system (see the Services article for the full walkthrough).
- Settings > Hours — open and close times per day.
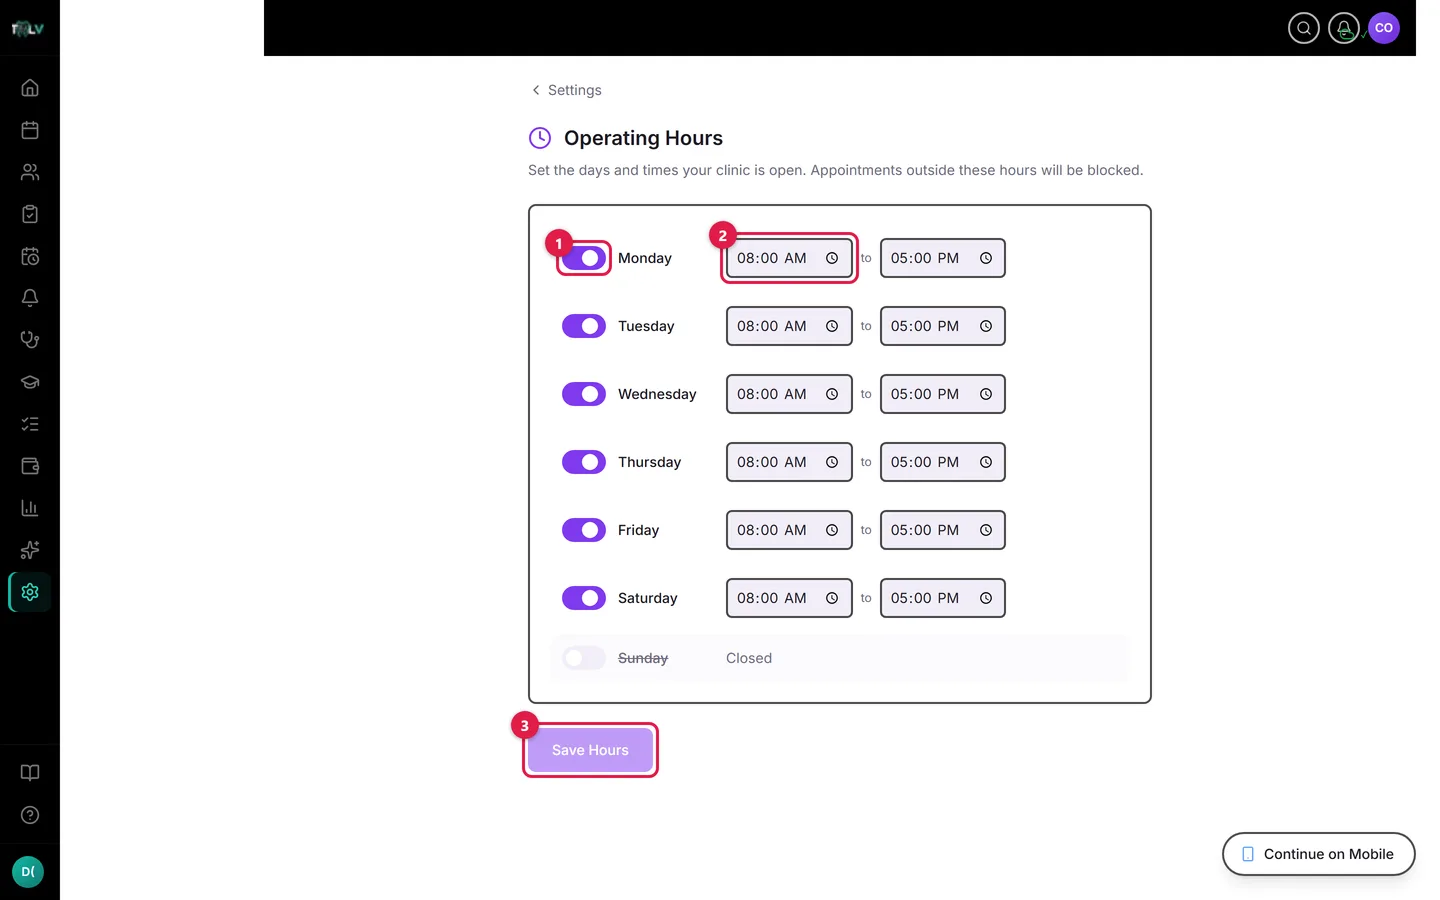
On this screen: ① Day switch — toggles a day open or closed; closed days show struck through. ② Opening and closing time — the bookable window for that day; appointments outside it are blocked. ③ Save Hours — applies the schedule; your public online-booking slots follow these hours automatically.
Appointments outside these hours are blocked, and your public online-booking slots follow them automatically — so setting hours once protects both your calendar and your lunch break.
Invite Your Team
Go to Settings > Team, click Invite, enter one or many email addresses, and pick a role per person:
- Full Access — everything except ownership transfer; your practice manager.
- Dentist — appointments and patient history.
- Dental Assistant — queue management and arrived patients.
- Front Desk — patients, appointments, SMS; no financial data.
- Admin (Finance) — reports, services, clinic settings.
Invitees receive an email and appear under pending invitations until they accept. The default permissions are sensible, and everything each role can open stays adjustable later in Settings > Roles — start people narrow; widening access takes a click, un-leaking financial data doesn't.
Make It Yours
Set your language in Settings > Language — English, Tagalog, or Taglish, chosen per user, with an owner-set clinic default for new members. Pick a theme in Settings > Appearance (Light, Dark, or System). And put your own mobile number in Settings > Account — staff alerts, the daily summary SMS, and password-reset codes all go there.
Day-One Launch Checklist
In order of payoff:
- Services entered with real prices — everything downstream prices off this.
- Operating hours saved — calendar and booking page now tell the truth.
- SMS reminder categories on (Settings > SMS) — no-show protection starts tonight.
- Team invited with conservative roles.
- First patients added as they call or walk in — the Patients article covers the fast path.
- When ready for the public: enable Online Booking and print the QR self-registration code for the front desk.
Six items, one afternoon, and the system is running the boring parts of the clinic by tomorrow morning.
Was this article helpful?
Need more help? Contact our support team