
Team Management and Roles
Learn how to invite team members, assign roles, and manage permissions for your clinic staff.
Access Is a Clinical Instrument
Who can see what in a clinic isn't bureaucracy — it's patient privacy (RA 10173 expects proportional access), financial hygiene (not everyone should read revenue), and operational sanity (the queue moves faster when the assistant's screen shows queue things). DentalView encodes all of that in roles, and this page is where people get them.
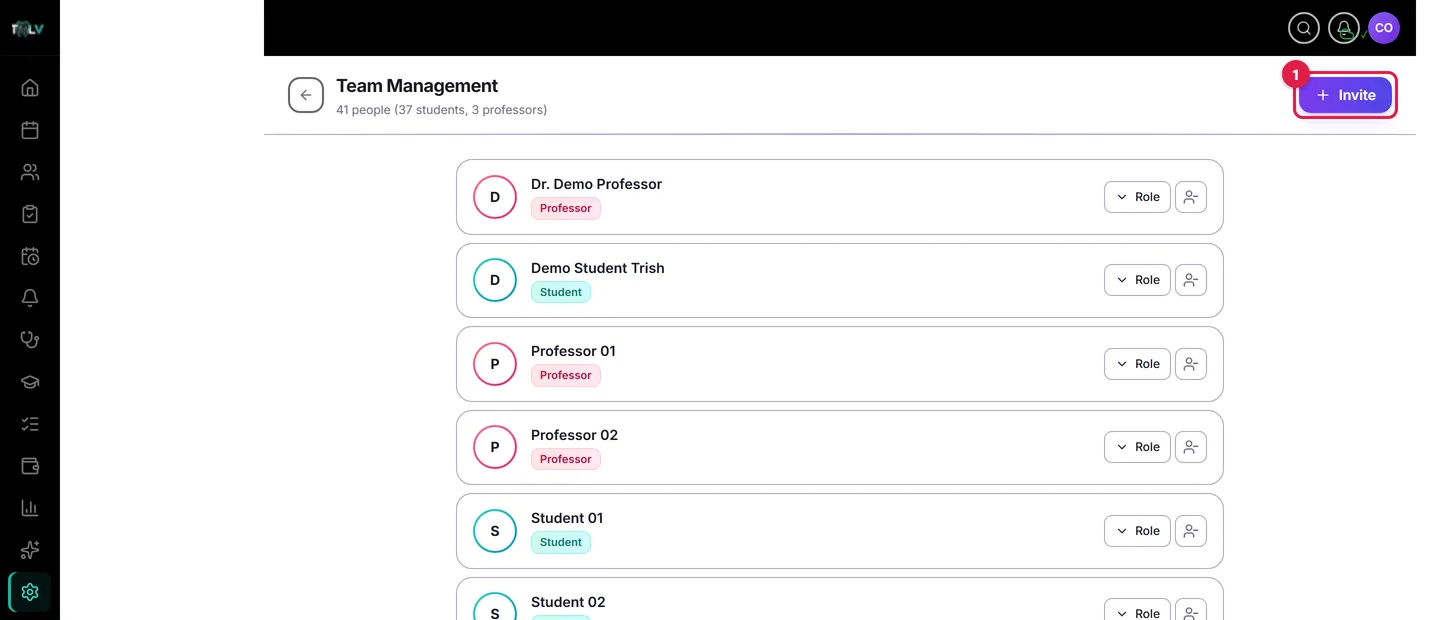
On this screen: ① Invite — opens the invitation form. The gauges above the roster show how many member and dentist seats your plan still has; the button disables when you've reached the cap.
Seats at a Glance
The page opens with your capacity: Team Members ({x} of {y}) and Dentists gauges. Standard includes 5 members with up to 3 dentists; Big Clinic includes 15 members with unlimited dentists. The Invite button disables when a cap is reached — the plan upgrade path is Settings > Billing > Change Plan. In teaching clinics, students and professors are seat-exempt, so a 40-person cohort costs nothing extra.
Inviting Members, Step by Step
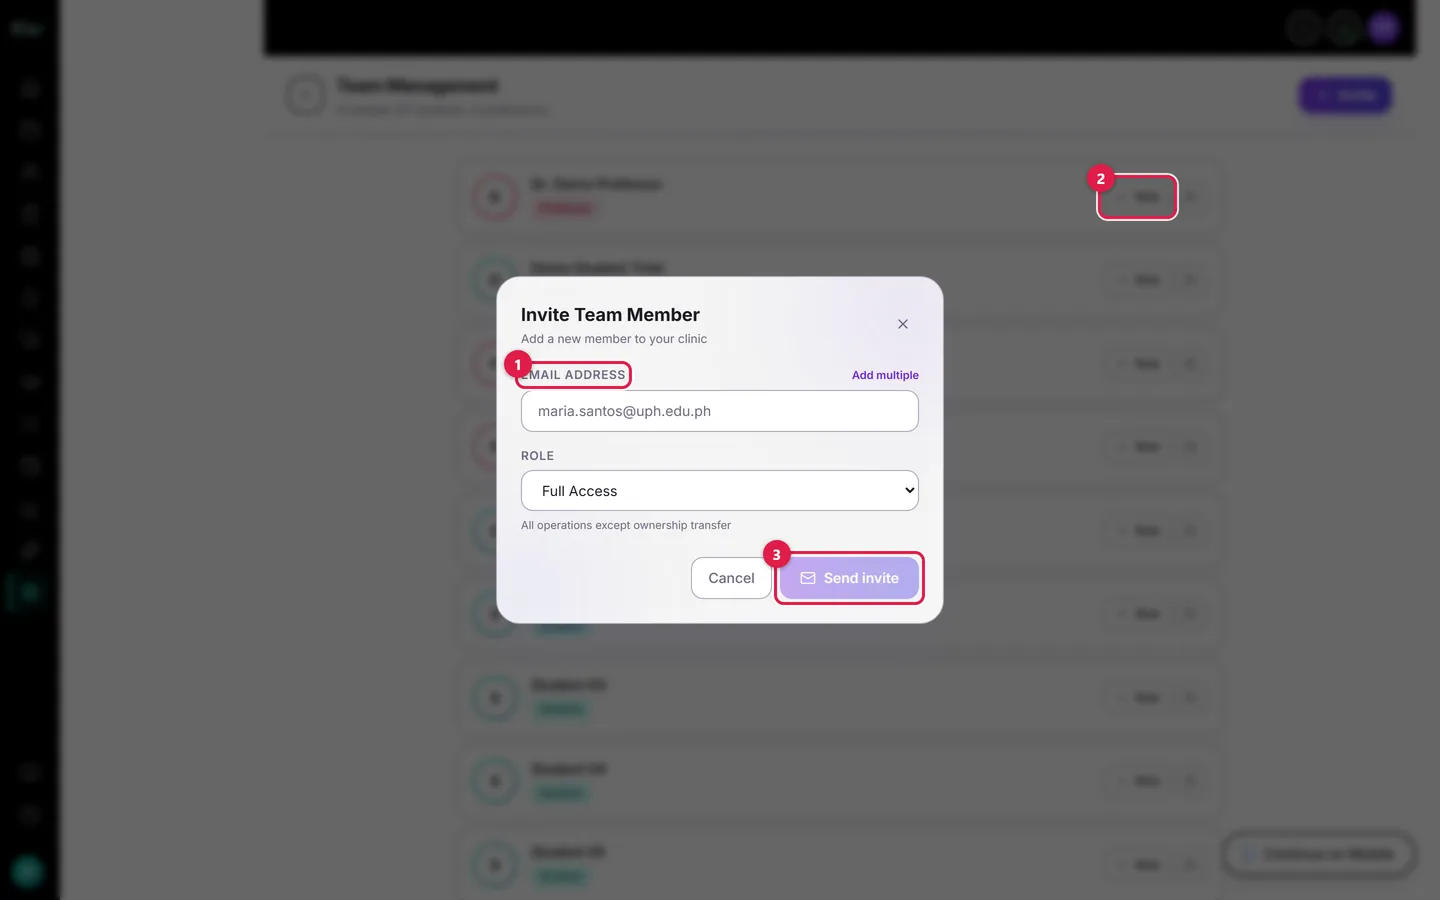
On this form: ① Email address — where the invitation is sent; use "Add multiple" to paste a whole list at once. ② Role — decides what they can open from day one: Full Access, Dentist, Dental Assistant, Front Desk, or Admin (Finance); the hint under the dropdown explains each. ③ Send invite — emails the invitation; if the address already has a DentalView account, they're added directly instead.
- Click Invite. For a batch, hit Add multiple and paste addresses separated by commas, spaces, or new lines.
- Click Send invite. The results panel is worth reading: sent means an invitation email went out to a new address; added means an existing DentalView user was attached directly (no email needed); skipped means they're already a member — the system quietly prevents double-invites.
Pending invitations sit in their own section with an expiry date; an expired invite just means send it again.
Choosing Roles Honestly
- Full Access — everything except ownership transfer. For the person who runs the clinic when you're not there — and only that person.
- Dentist — appointments and patient clinical history. Counts against the dentist cap.
- Dental Assistant — queue management and arrived patients; enough to run the flow without exposing records or money.
- Front Desk — patients, appointments, SMS. Deliberately no financial data: the busiest screen in the clinic doesn't need revenue on it.
- Admin (Finance) — reports, services, and clinic settings; bookkeeping without clinical charting.
When the defaults don't quite fit, don't improvise with a bigger role — adjust the specific permission in Settings > Roles, which edits what each role can open across the whole clinic.
Changing Roles and the Owner Crown
On any active member's row the owner clicks Role, picks the New Role, and saves — takes effect immediately. The owner badge (crown) is different: ownership moves only through Settings > Transfer, a deliberately guarded flow with its own PIN and OTP safeguards, never through this page.
Offboarding: Remove, Don't Erase
When someone leaves, click the remove icon on their row and confirm. Two things happen, and one pointedly does not:
- Their access ends immediately — the RA 10173-relevant part; a resigned employee reading patient records is a breach you prevent right here, ideally before the goodbye party.
- They move to the Deactivated section, reversible via Reactivate (seat caps permitting).
- Their work history does not vanish: appointments, procedures, and audit entries stay attributed to them. Records outlive employment — that's a feature.
Habit worth keeping: make removal part of the same-day exit routine, like collecting the keys.
Was this article helpful?
Need more help? Contact our support team